Summary
For this project we were given a video without sound and told to research how to make our own Foley to add to the video. We then went around the school doing random things like kicking a trash can or shaking a tree to get the sound effects we needed to add to the short video. We used Premiere Pro and Garage Band to edit the audio and attach it to the video.
Film Before Foley and Sound Effects
Film After Foley and Sound Effects
Some sounds and how we made them:
- Rumbling of earthquake was made by two people pounding repeatedly on a wall that gave off a hollow sound
- Screeching of train breaking was made by recording a door squeaking in Mr. Leduc’s room
- Shaking of trees was made by recording us shaking a tree
- Crackling/popping of wires was made by recording someone stepping on a candy wrapper
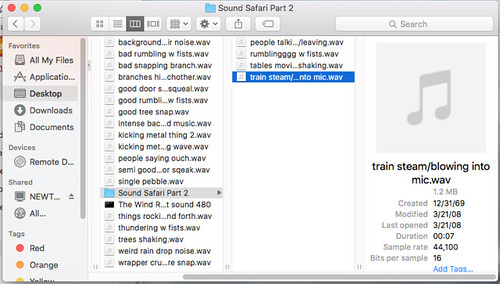
- Train steam after earthquake was made by people blowing into the microphone
Sound Library
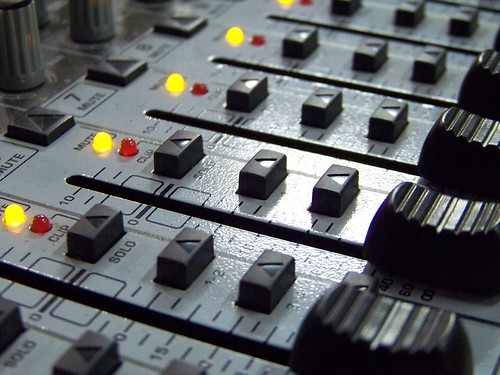
Audio Signal Chain Notes
“Sound is Half the Picture” – Steven Spielberg
Signal Chain – At the source a microphone converts sound energy into analog electric signals. This signal is carried down a cable and into a preamp on an audio recorder or camera where it is converted into a digital file.
Recording Devices
Single System Setup (Combined Video and Audio Production) – Audio is fed directly into the camera and recorded with the image.
- ADVANTAGE: Recording audio with video means there is no need to sync up the footage in post production.
- ADVANTAGE: This can be a huge time saver especially in tight turnaround situations like the news or documentary.
- With a camera designed for broadcast that has a robust and professional audio inputs and a preamp, the single system also avoids the cost purchasing additional recorders.
- DISADVANTAGE: If you don’t have a camera with high quality audio inputs, like a DSLR camera the sound quality will be lower.
Double System Setup (Video and Audio Production) – Sound is recorded into a dedicated (it just records sound) audio recording deck, like a Zoom or Tascam.
- Sound from the camera is still recorded if it’s available but used as a sync or scratch track.
Sync / Scratch Track – Audio recorded with the camera at the same time as an audio recording deck.
- The camera audio is used as a sync or scratch track to line up the video with the audio from the audio recording deck.
Double System Quality
- ADVANTAGE: It does not have to be attached to the camera.
- ADVANTAGE: Higher audio quality.
- Digital audio recorders have some great features that make for better recording.
- ADVANTAGE: Higher sampling rate.
- When an analog signal is converted to digital, the smooth analog curves of the wave signal have to be quantized
- DISADVANTAGE: You will have to sync the audio in post production, but you can use slates to line up the audio on each shot or use sync programs, so long as you record a scratch audio track on your camera.
Slate or Clapperboard – A device used in filmmaking and video production to assist in the synchronizing of picture and sound, and to designate and mark particular scenes and takes recorded during a production.
- Other names for the clapperboard include clapper, clapboard, slate, slate board, slapperboard, sync slate, time slate, sticks, board, and sound marker.
– https://en.wikipedia.org/wiki/Clapperboard
Quantized – Analog sound wave that is split up into samples with the amplitude, or height of the wave (bit depth), measured.
Sampling Rate – Number of times the wave form is sampled, per second, determines how accurate the digital representation matches the original analog waveform.
- More measurements = more accurate sound reproduction.
- Measured in kilohertz (1000 Hertz) – not to be confused with the frequency or pitch of a sound wave.
Analog Signal – Analog recording methods store signals as a continuous signal in or on the media.
- The signal may be stored as a physical texture on a phonograph record, or a fluctuation in the field strength of a magnetic recording.
- This is different from digital recording which digital signals are represented as discrete numbers. – https://en.wikipedia.org/wiki/Analog_recording
Sample Rate Values (Low) – 11 kHz – 11,000 times per second.
- Used for low quality internet voice transmissions.
- DISADVANTAGE: Doesn’t sound very good, but barely OK for voice.
- ADVANTAGE: Small file sizes.
Sample Rate Values (Middle) – 44.1 kHz – 44,100 samples per second
- Used for CD quality audio.
- 48 kHz is the standard for digital video.
- ADVANTAGE: 44.1 kHz and 48 kHz reproduce the full frequency range the human ear can hear.
Sample Rate Values (High) – 96 kHz. Twice the sampling rate of 48 kHz
- ADVANTAGE: The extra resolution just sounds better to many.
- 96 kHz seems to be more translucent than 48 kHz.
- ADVANTAGE: Having extra resolution makes post processing 96 kHz audio easier.
Bit Depth – How many different values of amplitude each sample can be.
- With 16 bit audio – each sample can have one of 65,536 values – that’s 2 to the 16th power. Most professional cameras and codecs record.
- ADVANTAGE: Dedicated audio recorders can deliver greater bit depth. They can record at 24 bit which gives each sample 16,777,216 possible values.
- ADVANTAGE: 24 bit resolution contributes to a translucent, higher quality sound.
- DISADVANTAGE: DSLR Camera’s, like the Canon EOS series, can only deliver 16 bit depth.
Sounds File Formats
Uncompressed WAV Files vs. Compressed MP3 Files
- ADVANTAGE: Dedicated audio recorders also have the ability to record uncompressed or compress audio wave files.
- ADVANTAGE: Always record uncompressed as WAV files.
- DISADVANTAGE: Compressed audio, as an MP3, throws away a lot of useful information that will come in handy in the post processing side.
- ADVANTAGE: Compressed audio, as an MP3 file, is about 10 times smaller than a WAV file.
The Deck
Preamp – Boost the signal of a microphone so it can be recorded.
- Most preamps have a switch that can be toggled between line or microphone signal.
- ADVANTAGE: Preamps in dedicated audio recorders tend to be quieter.
- DISADVANTAGE: Preamps in cameras and cheap equipment tend to be noisier.
Line Signal – A strong audio signal usually coming from a mixing console or playback device.
- Professional line out signals are designated as +4 dBu (1.228 volts root mean square, RMS ).
- Consumer line out signals are designated as -10 dBv (0.316 volts root mean square, RMS).
Microphone Signal – Far weaker than line signal at only 2 millivolts (two one thousandth of a volt).
- Preamps boost the microphone signal.
- Preamps invariably boost noise and some preamps are noisier than others.
- The more you pay the better the preamp.
Phantom Power – +48v supply of power down the microphone cable or line for condenser microphones.
Clip or Clipping – Looks like the top of the sound wave is being chopped off.
- Avoid clipping at all costs.
- 0 dBFS (decibel full scale) is set to the clipping point – the maximum loudness.
Headroom – The amount of dynamic range between the normal operating level and the maximum level, which is usually the onset of clipping <— bad bad bad.
- ADVANTAGE: Enough headroom keeps signal from clipping
- DISADVANTAGE: Too much headroom and there is not enough space between the recored signal and the noise floor, more noise is present in the recording.
- SUGGESTION: Keep average level between -20 and -12 that way any sudden spikes and boost in loudness will top off at -6bB – well below the clipping point.
Sound Source and Ambient Background Separation – Recommend keeping at least an 18dB separation between ambient sound and the desired sound so that you can ensure recording a clean signal.
Analog Cables
Analog cables come in two varieties; unbalanced and balanced.
Unbalanced Audio Cable – An unbalanced cable is comprised of two wires – one serving as a ground which is the zero point for the analog signal and one serving as the hot which is the signal itself.
- ADVANTAGE: Simplest and cheapest type of cable.
- DISADVANTAGE: Unbalanced cables are mainly used for short runs because interference can still sneak in and create noise in the signal
- In a shielded low voltage cable, a metal foil or braid is wrapped around the hot and acts as the ground protecting the signal from interference from outside sources.
- They have either one of these connectors:
- Minijack (1/8th inch or 3.5mm connector)
- Quarter inch connector (phono plug or tip sleeve connector)
- RCA connector and are usually mono – that is one channel of audio
Balanced Audio Cables – A balanced cables use 3 wires and have either an XLR connection (microphone connector) or TRS quarter inch connection which is tip-ring-sleeve (this connector may also be used for stereo unbalanced signals).
- Made of three wires: ground, hot, and cold.
- Ground wire is often the shield.
- The audio signal goes down two wires, hot and cold, with the second signal reversed in polarity sometimes called the cold signal.
- TRS connectors – or Tip Ring Sleeve connectors do the same thing as XLRs except instead of having 3 pins, the different signals are handled by the:
- tip (hot)
- the ring (cold)
- the sleeve (ground)
- ADVANTAGE: When the signal reaches the end of the line, the polarity of the cold is reversed and added to hot.
- The revising cancels out any noise in the signal.
- ADVANTAGE: Balanced cables are capable of long runs without much interference.
- ADVANTAGE: XLR input connectors are sturdy and will hold up to a lot of abuse.
Microphones
Impedance – Impedance is a measure of opposition a device has to AC current
- Basically the combined effect of capacitance, inductance, and resistance.
- Designated as the letter Z and measured in ohms or the Greek letter Omega.
- Low impedance microphones, sometimes labeled Low-Z have impedance of less than 600 ohms.
- Medium impedance mics have between 600 and 10,000 ohms.
- High impedance is anything above 10,000.
- ADVANTAGE: In the audio chain always go from low to high impedance.
- ADVANTAGE: The microphone should be rated lower than the recorder or else you have degraded signal.
Microphone Placement – The first and most important thing to remember about audio recording is that sound dissipates according to the inverse square law.
- The power of a sound wave decreases by the inverse of the square of the distance – if you double the distance between your microphone and the sound source, you reduce the power of the sound waves to a quarter.
- Triple it, and power reduces to a ninth.
- ADVANTAGE: Get the microphone as close as you can to the subject.
Proximity Effect – Cardiod microphones and other non-directional microphones exhibit a boost of the bass frequencies when the sound source is very close to the microphone.
Boom Mic – Booming is simply putting a microphone on a pole and holding the boom so the microphone is just out of the frame either from above or from below.
- Often times a shotgun microphone is used at the end of the boom.
Shotgun Mic – They have a tight polar pattern like a supercardioid capsule.
- A long interference tube that sits in front of the capsule and is what gives it a tightly focused pickup pattern.
- Sound that travels on axis will hit the microphone capsule unimpeded.
- ADVANTAGE: For booming outdoors, shotgun mics are a great option.
- ADVANTAGE: Sound that is coming from the sides will be forced to go through slots and since sound waves will hit the slots at different times, they will be out of phase and start canceling each other out.
- ADVANTAGE: The longer the interference tube, the more directional the pickup pattern.
- ADVANTAGE: Shotguns work best when the unwanted noise is relatively different from the desired noise.
- DISADVANTAGE: Off axis Sound from moving objects will not be filtered as well because the the wave is changing position as it is entering the interference tube.
- DISADVANTAGE: Shotguns can behave strangely in really small rooms or in highly reverberant spaces where the off axis sound will become colored.
Lavalier and Pin Mics – Small microphones hidden on the source of sound, generally attached on or near the chest, to get sound closer to the source.
- ADVANTAGE: Very small and can be hidden.
- ADVANTAGE: Moves with the source of sound.
- ADVANTAGE: Used a lot in live performances.
- DISADVANTAGE: You just have to be concerned about unwanted rustling sounds depending on placement.
Foley and Sound Effects Terms
What I Learned and Problems I Solved
For this project the biggest thing I learned about was what Foley is and how to creatively use it to my advantage. I learned that sound effects can shape a story just as much as visual elements can, and the audio can create its own landscape all on its own. Therefore, the better sound effects and audio you have, the greater the effect it will have on the film. One problem I solved was when I was editing and adding in the sound effects to the movie in Premiere Pro, was that the video sounded really bland. To fix this I decided to add background music, but since I had never composed or made music of my own I figured out how to download free background music tracks. I added an intense track to my video and shortened it a little to fit, and even though it didn’t quite match the video it made it a lot more interesting to watch.